
Are your photos coming out blurry? It’s frustrating: you capture a beautiful moment, and when you look at it, the image is blurry everywhere or just a bit « soft. » Before assuming your device is broken, know that blurriness most often has simple and avoidable causes—a dirty lens, camera shake at the moment of the shot, a missed focus, lack of light, or poor settings. Most of these issues can be fixed with a few easy steps, without being a photographer. By understanding the source of the blur, you can avoid it next time. Let’s see why photos are blurry, how to fix it, and how to tell if the problem comes from the device.
Why are photos blurry?
Several causes can explain blurry photos; let’s look at them. A DIRTY LENS: the lens covered with smudges, grease, or dust; the image is blurry/hazy; the most common cause; check this first. CAMERA SHAKE: moving at the moment of the shot (unstable hand); the image is blurry; very frequent; avoid it. MISSED FOCUS: the device focuses on the wrong spot; the subject is blurry; common; fix it. LACK OF LIGHT: in low light, the device struggles (longer exposure = blur); a major cause; to know. A MOVING SUBJECT: a moving subject (child, animal); motion blur; frequent; manage it. A FILM/protection on the lens: a dirty or poor-quality protection in front of the lens; it hazes; check it; possible. DIGITAL ZOOM: zooming too much (digitally) degrades and blurs; avoid excessive zoom; common. POOR SETTINGS: an unsuitable mode; the image comes out bad; adjust it; possible. CONDENSATION: fog on the lens (cold/hot); it blurs; let it dry; possible. A DEVICE ISSUE: damaged lens, faulty sensor; rarer but possible; diagnose it; serious. In summary, several causes can explain blurry photos, and most are easy to fix. The most frequent: a DIRTY LENS (covered with fingerprints, grease, or dust: the image comes out hazy or blurry—the most common cause, check this first), CAMERA SHAKE (moving at the moment of the shot, unstable hand: very frequent), MISSED FOCUS (the device focuses on the wrong spot: the subject is blurry), LACK OF LIGHT (in low light, the device struggles and the exposure time increases, creating blur: a major cause), and a MOVING SUBJECT (a child, a moving animal: motion blur). Other causes: a dirty FILM or PROTECTION in front of the lens (which hazes), EXCESSIVE DIGITAL ZOOM (which degrades the image), POOR SETTINGS (an unsuitable mode), CONDENSATION (fog on the lens when transitioning from cold to hot), or, more rarely, a DEVICE ISSUE (damaged lens, faulty sensor). Rest assured: most of these causes (dirty lens, camera shake, focus, light) can be fixed with simple steps, without being a photographer. Let’s see how.
Blurry photos usually happen because of simple things like a dirty lens, shaky hands, or not enough light. These are easy to fix. Only rarely is the camera itself broken.
You take a photo of your dog in low light. The camera struggles to capture enough light, so it takes longer. If you move even a little, the photo comes out blurry. The solution? Hold the camera very still and use a light source.

How to avoid blurry photos
Here are the steps for sharp photos, from the simplest to the most useful; follow them. CLEAN the lens: wipe the lens with a soft cloth; remove smudges and grease; the first step; very effective. STABILIZE the device: hold it firmly, with two hands, brace yourself; avoid camera shake; essential; useful. TOUCH to focus: touch the subject on the screen to focus on it; the subject is sharp; simple; important. Ensure LIGHT: photograph with enough light (near a window, outside); less blur; key; useful. Avoid MOVING at the shot: press gently, wait for the capture; don’t move; stable; tip. Wait for the SUBJECT: for a moving subject, wait for a calmer moment; reduce motion blur; useful; tip. Avoid DIGITAL ZOOM: get closer instead of zooming; keep the sharpness; clever; tip. Check the FILM/protection: clean or remove a dirty protection in front of the lens; don’t haze; useful. Let the FOG dry: if condensation, wait for it to dry; the lens clears up; patient; useful. Aim BEFORE shooting: frame, focus, stabilize, then shoot; the method; effective; tip. In summary, to avoid blurry photos, a few simple steps make all the difference. First: CLEAN THE LENS (with a soft cloth: remove fingerprints and grease—often, a clean lens is enough to restore sharpness). Then, STABILIZE the device (hold it firmly, with two hands, brace your elbows or lean against something: to avoid camera shake, a very frequent cause) and DON’T MOVE at the moment of the shot (press gently and wait for the photo to be taken). For subject sharpness: TOUCH the subject on the screen to FOCUS on it (the device then focuses where you want). Ensure enough LIGHT (photograph near a window or outside; in low light, blur is frequent). For a MOVING SUBJECT (child, animal), wait for a calmer moment. Avoid DIGITAL ZOOM (get closer instead of zooming, which degrades and blurs the image). Check that a dirty FILM or protection isn’t hazing the lens (clean or remove it), and if FOG (condensation) appears when transitioning from cold to hot, let it dry. The winning method: frame, focus (by touching the subject), stabilize, then shoot gently. These simple steps are enough to get sharp photos in most situations.
The three anti-blur reflexes: clean the lens, stabilize the device, and touch the subject on the screen to focus. Most blurry photos come from three avoidable causes—and three simple reflexes fix them. Adopt them, and your photos will be much sharper. Reflex 1: CLEAN the lens. This is the most frequent AND easiest cause to fix, yet the most forgotten. The lens of your device (especially on a phone you handle constantly, place everywhere, take out of your pocket) quickly gets covered with FINGERPRINTS, GREASE, and DUST. Result: all your photos come out blurry, hazy, or with a halo—as if you were looking through a dirty window. The reflex to take: systematically wipe the lens with a SOFT cloth (microfiber, or a clean cotton garment) BEFORE photographing, especially if your photos are blurry. This simple step alone solves a huge proportion of blur issues. Make sure you’re cleaning the lens (not just the screen), and remove any dirty protection covering it if needed. Reflex 2: STABILIZE the device. CAMERA SHAKE—a small hand movement at the moment you press—is a major cause of blur, often invisible to the eye but fatal to the photo. To avoid it: hold your device FIRMLY, ideally with TWO HANDS, brace your elbows against your body (or lean against a wall, a piece of furniture, place the device on a stable surface), and STAY IMMOBILE at the moment of shooting. Press GENTLY on the shutter (a sudden pressure shakes the device) and wait a short moment for the photo to be properly taken before moving (the device sometimes takes a fraction of a second to capture, especially in low light). This stability is crucial, especially when there’s little light (the exposure time then increases, and the slightest shake shows). Reflex 3: focus on the subject. Often, the photo is blurry because the device focused on the WRONG SPOT (on the background instead of your subject, for example). The solution is simple on a phone: TOUCH the SUBJECT directly on the SCREEN before shooting—the device will then focus PRECISELY where you want (on the face, the object, the person). Wait for the image to be sharp (the device adjusts), then shoot. This small step ensures your main subject will be sharp. A fourth essential factor, not to be neglected: LIGHT. In low light (dark interior, evening, poorly lit room), the device needs more time to capture the image, which accentuates ALL blurs (camera shake, motion). So photograph with as much light as possible when you can (near a window, outside, in a well-lit room): your photos will be sharp much more easily. In summary, the three anti-blur reflexes: CLEAN the lens (the #1 cause, the most forgotten: a soft cloth before photographing), STABILIZE the device (firmly, with two hands, immobile at the shot, gentle press: against camera shake), and focus on the subject (touch it on the screen: so it’s sharp). Add good LIGHT (which makes everything easier), and your photos will be sharp in most situations. These simple steps, once they become habits, radically transform the sharpness of your photos.
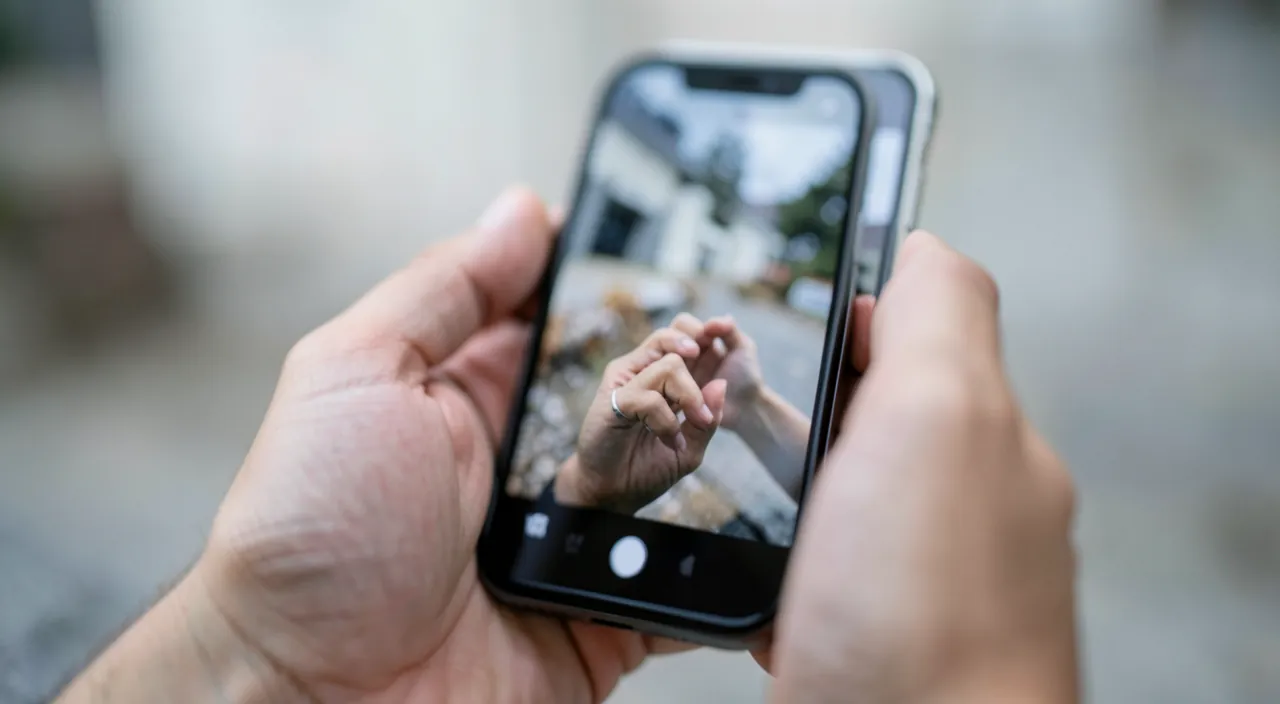
Depending on the situation: managing blur properly
Blur has different causes depending on the situation; here’s how to handle them. In LOW LIGHT: look for more light, stabilize as much as possible (place the device); the blur comes from lack of light; useful. A MOVING SUBJECT: wait for a calm moment, or anticipate; motion blur is managed by timing; tip. A GROUP PHOTO: ensure light, stabilize, focus; everyone sharp; useful. A CLOSE-UP: back up a bit if too close (the device no longer focuses from too close); keep the sharpness; tip. FROM AFAR: avoid digital zoom, get closer; preserve quality; clever. IN MOTION (you): stop to photograph; don’t move while photographing; stable; tip. ARTISTIC BLUR: sometimes the background blur is intentional (portrait); distinguish accidental blur from intentional blur; nuance; to know. CHECK the taken photo: look after the shot (sharp?); retake if needed; correct on the spot; useful. USE the self-timer: to avoid camera shake from the shot, the self-timer helps; a trick; useful; tip. PRACTICE: with these steps, sharpness comes with practice; practice; progressive; encouraging. In summary, blur has different causes depending on the situation: handle it accordingly. In LOW LIGHT (a major cause of blur), look for more light and STABILIZE as much as possible (place the device on a surface, lean against something). For a MOVING SUBJECT (child, animal), manage the TIMING: wait for a calmer moment, or anticipate the movement. For a GROUP PHOTO, ensure light, stabilize, and focus. For a CLOSE-UP, back up a bit if you’re too close (the device no longer focuses from too close). FROM AFAR, avoid DIGITAL ZOOM (which blurs) and get closer instead. If YOU are moving, STOP to photograph. Know how to distinguish ACCIDENTAL BLUR from INTENTIONAL BLUR (a blurry background can be INTENDED, like in a portrait: it’s not a flaw). Take the reflex to CHECK the photo right after the shot (is it sharp? if not, retake it on the spot), and use the SELF-TIMER to avoid camera shake from the shot when the device is placed (a useful trick). Finally, PRACTICE helps: with these steps that become habits, your photos will be sharper and sharper. By adapting your approach to each situation, you avoid blur where it lurks the most.
Warning: clean the lens with a soft cloth (without scratching), and if the blur persists despite all the steps, have the device checked. A few precautions against blurry photos. First point: CLEAN the lens with CARE, without scratching it. The lens is the #1 cause of blur, and cleaning it is the first step—but do it CORRECTLY. Use a SOFT cloth (preferably microfiber, or a clean, soft fabric): NEVER use a rough or abrasive material (sandpaper, coarse fabric) that could SCRATCH the lens—a scratch on the lens DEFINITELY degrades your photos (blur, permanent halos). Also avoid aggressive products: a soft, dry cloth, or slightly dampened with water, usually suffices. Blow off the dust first before wiping (to avoid rubbing and scratching). Treat the lens with the same care as a pair of glasses. Second point: if the blur PERSISTS despite all the steps, have the DEVICE CHECKED. In most cases, the blur comes from avoidable causes (dirty lens, camera shake, focus, light), and simple steps fix it. But if, despite a clean lens, good stability, correct focus, and enough light, your photos are STILL SYSTEMATICALLY blurry, it might be a DEVICE ISSUE: a DAMAGED lens (scratched, cracked), a faulty focusing mechanism, or a faulty sensor. Then have the device checked by a professional. This is especially to consider if the blur appeared after an IMPACT or a DROP (the lens or the mechanism may be damaged), or if a spot in your photos is always blurry in the same place (scratch or ingrained dirt on the lens). Third point: beware of a SCRATCHED or damaged lens. A scratched (by sand, a key in your pocket, a rough cleaning) or cracked lens gives permanently degraded photos, and doesn’t « clean » itself: it needs to be repaired/replaced by a professional. So protect your lens (avoid scratching it, use a quality protection if needed). Fourth point: don’t confuse ACCIDENTAL BLUR and INTENTIONAL BLUR. Some photos have a deliberately blurry background (portraits, « portrait » mode): this is a sought-after AESTHETIC effect, not a flaw. The real problem is when the SUBJECT (what you wanted sharp) is blurry. Don’t worry about a nice background blur when the subject, itself, is sharp. Fifth point: CONDENSATION (fog) is not a malfunction. If your lens gets foggy (transition from cold to hot, humidity), the photos are blurry until it dries: this is not a flaw, just let the device return to temperature and dry, and don’t wipe frantically (wait). Sixth point: beware of « miracle » anti-blur apps. Once a photo is taken blurry, you don’t really recover the lost sharpness: apps that promise to « un-blur » a photo have very limited results. Better to PREVENT blur at the time of the shot (with the right steps) than to hope to correct it after. In summary: clean the lens with a SOFT cloth without scratching it (never abrasive material: a scratch definitely degrades photos; blow off the dust before wiping), and if the blur PERSISTS despite all the steps (clean lens, stability, focus, light), have the DEVICE CHECKED by a professional (damaged lens, faulty mechanism—especially after an impact). Protect your lens from scratches, don’t confuse accidental blur and intentional artistic blur, know that fog is not a malfunction (let it dry), and beware of « miracle » anti-blur apps (better to prevent than to correct). With these precautions, you get sharp photos and preserve your device.

Frequently asked questions
Why are my photos blurry especially indoors or in the evening?
Because lack of light is a major cause of blur: in low light, the device needs more time to capture the image, which accentuates the slightest shake; look for more light, stabilize as much as possible (place the device), and avoid moving. Let’s see. LACK OF LIGHT: indoors/evening, there’s less light; the device struggles; hence the blur; the cause. MORE TIME to capture: in low light, the device « lets in » light longer; this longer time captures the slightest movement; hence the blur; mechanism. ACCENTUATED SHAKE: the slightest hand tremor then shows; shake becomes fatal; stabilize; important. A MOVING SUBJECT: a moving subject in low light = guaranteed blur; the long exposure captures the movement; difficult; to know. LOOK FOR MORE LIGHT: get closer to a light source (window, lamp), turn on lights; more light = less blur; the solution; tip. STABILIZE as much as possible: place the device on a surface, lean against something; reduce shake to a minimum; crucial in the evening; useful. DON’T MOVE: immobile at the shot, gentle press, wait for the capture; even more important in low light; tip. NIGHT MODE (if available): some devices have a night mode that helps; to use; but stability required; useful. THE SELF-TIMER: placed device + self-timer = zero shake from the shot; a trick for the evening; clever; tip. THE ADVICE: lack of light is a major cause of blur (the device needs more time, which accentuates shake); look for more light, stabilize as much as possible (place the device, use the self-timer), and don’t move; use night mode if it exists. In summary, your photos are blurry especially INDOORS or in the EVENING due to LACK OF LIGHT—a major cause of blur, which is important to understand. Here’s the mechanism: to take a photo, the device needs to capture light. When there’s A LOT of light (outside, in daylight), it captures the image very quickly, in an instant: blur is rare. But when there’s LITTLE light (dark interior, evening, poorly lit room), the device needs MORE TIME to « let in » enough light and form the image. But during this longer time, the SLIGHTEST MOVEMENT is captured: the natural slight tremor of your hand (shake), or the movement of your subject, then translates into BLUR. That’s why blur is much more frequent in low light. The solutions: first, look for MORE LIGHT when possible—get closer to a WINDOW, turn on lights, bring a lamp closer. The more light, the less blur: it’s the most determining factor. Then, STABILIZE AS MUCH AS POSSIBLE: since the slightest shake shows in low light, hold the device very firmly with two hands, and even better, PLACE it on a stable surface (a table, a piece of furniture) or lean against a wall. DON’T MOVE AT ALL at the moment of the shot: press gently and wait for the photo to be properly taken (the device takes more time in low light). A very effective trick in the evening: place the device and use the SELF-TIMER—thus, the simple act of pressing the shutter doesn’t move the device (zero shake). Finally, if your device has a NIGHT MODE, use it: it’s designed for low light (but it requires staying very still). For MOVING SUBJECTS in low light (children running in the evening), it’s more difficult—look for the maximum light and a calmer moment. In summary: blur indoors or in the evening comes from lack of light (which increases capture time and accentuates shake); look for more light, stabilize as much as possible (place the device, self-timer), don’t move, and use night mode if it exists. With enough light and stability, even your evening photos will be sharper.

How to focus on what I want?
On a phone, simply touch the subject on the screen before shooting: the device then focuses precisely at that spot; wait for the image to be sharp, then take the photo—this is the simplest way to have a sharp subject. Let’s see. TOUCH the subject on the screen: on a phone, touch the subject on the screen; the device focuses on it; simple; effective. The spot WHERE YOU WANT: by touching, you choose where the device focuses; the subject (not the background); precise; important. WAIT for sharpness: after touching, let the device adjust (the image becomes sharp); then shoot; patience; tip. A frame/indicator: often a square/circle indicates where the focus is; visualize the sharp area; useful. REFOCUS if needed: if you reframe or the subject moves, retouch to refocus; adjust; tip. AUTOFOCUS: without touching, the device focuses on its own (sometimes in the wrong spot); hence the interest of touching; control it. LOCK FOCUS (option): some devices allow locking focus (long press); useful for reframing; advanced; option. NOT TOO CLOSE: the device doesn’t focus from too close (extreme close-up); back up a bit; to know. CHECK after: look if the subject is sharp after the shot; retake if needed; control; useful. THE ADVICE: on a phone, touch the subject on the screen before shooting; the device focuses precisely on it; wait for the image to be sharp, then take the photo; refocus if you reframe or if the subject moves. In summary, to focus on what you want, the method is very simple on a phone (and most modern devices): TOUCH the SUBJECT directly on the SCREEN before shooting. By touching the precise spot where you want sharpness (the face of a person, the object, the main subject), you TELL the device to focus there—and not elsewhere. This is important because, left to its own devices, the device focuses AUTOMATICALLY, sometimes in the WRONG SPOT (on the background instead of your subject, for example): by touching, you take control and ensure your subject will be sharp. How to proceed concretely: 1) frame your photo; 2) TOUCH the subject on the screen (a square, a circle, or an indicator often appears at that spot, showing where the focus is); 3) WAIT a short moment for the device to ADJUST sharpness (the image becomes sharp on the subject); 4) then SHOOT. This small step—touch, wait, shoot—makes a huge difference in subject sharpness. A few useful details: if you REFRAME after focusing, or if your SUBJECT MOVES, REFOCUS (retouch the screen); some devices allow LOCKING focus (often by a long press on the screen), practical for reframing without the focus changing; and know that the device doesn’t focus FROM TOO CLOSE (for an extreme close-up, back up a bit, otherwise it stays blurry). Finally, take the reflex to CHECK your photo right after the shot: is the subject really sharp? If not, retake it by paying attention to focus. In summary: touch the subject on the screen before shooting (to focus precisely on it), wait for the image to be sharp, then take the photo; refocus if you reframe or if the subject moves, and check the result. This simple step ensures that what you want sharp will be.

Can a blurry photo already taken be made sharp?
Not really: once a photo is taken blurry, the lost sharpness isn’t really recovered; tools that promise to « un-blur » have very limited results; better to prevent blur at the time of the shot than to hope to correct it after. Let’s see. NOT really recoverable: a blurry photo doesn’t really become sharp; the lost sharpness is lost; that’s the limit; to know. Blur = lost information: blur corresponds to uncaptured details; you can’t recreate what wasn’t recorded; logical; important. « UN-BLUR » tools: apps/software promise to improve; the results are limited; don’t count on them; nuance. A slight IMPROVEMENT possible: you can sometimes slightly accentuate/improve; but not turn blur into sharpness; marginal; realistic. EXAGGERATED promises: beware of tools that promise miracles; often disappointing; caution; tip. PREVENT rather than cure: better to avoid blur at the shot (good steps); the real solution is upstream; essential; important. RETAKE the photo: if possible, retake the photo by paying attention (lens, stability, focus, light); a sharp photo is better; tip. CHECK on the spot: control sharpness right after the shot to retake if blurry; correct in time; clever; useful. Accept some LOSSES: a unique missed photo (passed moment) is sometimes irrecoverable; hence the importance of doing it right; lesson; realistic. THE ADVICE: not really; lost sharpness isn’t recovered (tools to « un-blur » have very limited results); better to prevent blur at the shot (clean lens, stability, focus, light); check on the spot to retake if needed. In summary, no, a blurry photo already taken CANNOT really be made sharp—it’s important to know to avoid false hopes. The reason is fundamental: blur corresponds to details that WEREN’T CAPTURED correctly at the time of the shot. But you can’t RECREATE information that was never recorded: lost sharpness is lost. This is a fundamental technical limit, not a question of tool. You’ll see applications and software that promise to « UN-BLUR » or « recover » a blurry photo: beware of these promises. Their results are in reality VERY LIMITED. At best, they can SLIGHTLY improve a slightly « soft » photo (slightly accentuate edges, marginally improve); but they CANNOT turn a truly blurry photo into a sharp one—that’s magic, not technique. So don’t count on a « miracle » un-blurring, and beware of tools (sometimes paid or dubious) that promise it. The real solution is elsewhere: PREVENT blur AT THE TIME of the shot, rather than hoping to correct it after. That’s why the good steps at the shot are so important: CLEAN the lens, STABILIZE the device, focus on the subject, and ensure enough LIGHT. Adopt them, and your photos will be sharp from the start. Two precious complementary reflexes: CHECK your photo RIGHT AFTER the shot (is it sharp? if not, RETAKE it right away by paying attention to the steps—while the scene is still there); because once the MOMENT IS GONE (a unique instant, a scene that won’t happen again), a missed photo is sometimes definitely lost. In summary: no, you don’t really recover a blurry photo (lost sharpness is lost, and tools to « un-blur » disappoint); the real solution is to PREVENT blur at the shot (clean lens, stability, focus, light) and check on the spot to retake if needed. Better a sharp photo from the first try than a vain hope of correcting it after.
What to remember
Blurry photos are frustrating, but blur most often has SIMPLE and AVOIDABLE causes—not a device malfunction. Frequent causes: a DIRTY LENS (smudges, grease: the #1 cause, the most forgotten), CAMERA SHAKE (unstable hand at the shot), MISSED FOCUS (the device focuses on the wrong spot), LACK OF LIGHT (major cause: in low light, the device takes longer to capture, which accentuates the slightest shake), a MOVING SUBJECT, and EXCESSIVE DIGITAL ZOOM. The three ANTI-BLUR reflexes to adopt: CLEAN the lens (with a soft cloth, before photographing: this simple step solves a huge part of blurs), STABILIZE the device (firmly, with two hands, immobile at the shot, gentle press: against shake), and focus on the subject (touch it on the screen so it’s sharp). Add good LIGHT (the most determining factor: photograph near a window or outside; indoors or in the evening, look for more light and place the device, or use the self-timer and night mode). Adapt to situations: in low light, stabilize as much as possible; for a moving subject, manage the timing; from afar, get closer instead of zooming; and check your photo right after the shot to retake it if it’s blurry. Precautions: clean the lens with CARE (soft cloth, never abrasive material that would SCRATCH it—a scratch definitely degrades photos; blow off the dust before wiping), and if the blur PERSISTS despite all the steps (clean lens, stability, focus, light), have the DEVICE CHECKED by a professional (damaged lens, faulty mechanism—especially after an impact). Know how to distinguish ACCIDENTAL BLUR from INTENTIONAL ARTISTIC BLUR (a blurry background in a portrait isn’t a flaw), and that fog (condensation) isn’t a malfunction (let it dry). Finally, remember that a photo ALREADY taken blurry can’t be REALLY recovered: lost sharpness is lost, and tools to « un-blur » disappoint—better to PREVENT blur at the shot than to hope to correct it after. In short, the key to sharp photos lies in a few simple steps, to turn into habits: clean lens, stable device, focus on the subject, and good light. Adopt them, check your photos on the spot, and blur will soon be just a bad memory—without needing to be a photographer.


Persistent malfunction, capricious device? Our remote troubleshooting service quickly resolves your problem, without jargon.
Leave a Reply
You must be logged in to post a comment.