
You’re listening to music, watching a video, or making a call, and the sound is unpleasant: it crackles, spits, distorts, or emits crackling noises. Instead of a clear sound, you hear a distorted mess that ruins the listening experience and strains your ears. This is a common, often minor issue with varied causes: a volume turned up too loud, a misadjusted setting, a faulty cable or connector, a clogged speaker, or a software issue. The good news: in most cases, you can restore clean sound with a few simple checks, without needing to replace anything. Let’s see how to fix saturated or crackling sound: understanding where the distortion comes from, the steps to correct it, and how to maintain high-quality sound.
Where does saturated or crackling sound come from?
Sound distorts for several reasons; identifying them helps fix the issue. What is SATURATION: Saturated sound is sound PUSHED beyond what the hardware can properly reproduce; it distorts, “spits,” becomes harsh and unpleasant; it’s often a matter of TOO MUCH VOLUME (we’ll come back to this). CRACKLING: Crackling, popping, or interference in the sound; often a connection issue (cable, connector), interference, or hardware problem; the sound is “dirty” rather than just loud; the causes differ slightly. TOO MUCH VOLUME: The most frequent cause of saturation; a volume pushed to maximum (on the DEVICE AND in the app) saturates the sound; lowering the volume often fixes it; excess deforms (we’ll come back to this). A MISADJUSTED SETTING: Inappropriate audio settings (pushed equalizer, effects, excessive amplification, “boost”) can saturate or distort; reverting to neutral settings helps; the configuration matters. A FAULTY CABLE or CONNECTOR: For wired sound (headphones, speakers, jack cable), a damaged cable, a dirty or poorly inserted connector causes crackling and dropouts; checking the connection helps; wired connections wear out. A CLOGGED or DAMAGED SPEAKER: Dust, dirt in a speaker, or a damaged speaker distorts the sound; cleaning sometimes helps; a worn or punctured speaker crackles; hardware wears out. INTERFERENCE: For wireless sound (Bluetooth), interference, excessive distance, or an unstable connection cause crackling and dropouts; moving closer, reducing interference helps; wireless is sensitive. A SOFTWARE ISSUE: Sometimes, a bug, a faulty audio driver, or a problematic app distorts the sound; restarting, updating helps; software may be the culprit. THE SOURCE ITSELF: Sometimes, it’s the file or stream that’s of poor quality (saturated recording, excessive compression); the sound is distorted at the source; testing another source confirms it; then it’s not your hardware. DISTINGUISHING CASES: Does the distortion come from the volume (lowering it fixes it)? From a connection (moving the cable changes it)? From a specific source (is another one clean)? These tests target the cause; observation guides. WHY IT MATTERS: Knowing that saturated sound often comes from too much volume or a setting, and that crackling often comes from a connection or hardware, helps target the right check rather than guessing. The key idea: Saturated sound (harsh, “spitting”) most often comes from TOO MUCH VOLUME or a PUSHED SETTING (equalizer, amplification), while crackling sound (crackling, interference) comes more from a FAULTY CONNECTION (cable, connector, unstable Bluetooth), a clogged or damaged speaker, or a software issue; sometimes, it’s the source itself that’s of poor quality. Most of these causes are minor and can be fixed with simple checks: lowering the volume, adjusting settings, checking cables and connections, cleaning, testing another source. Distinguishing saturation (volume/setting) and crackling (connection/hardware) helps target the right solution. Understanding where the distortion comes from is the first step to restoring clean sound.
Saturated sound is usually caused by turning the volume too high or tweaking settings like the equalizer. Crackling often comes from bad connections, like a damaged cable or dirty port, or from a worn-out speaker. Most of the time, you can fix these issues without replacing anything—just by adjusting settings or cleaning parts.
You’re listening to music on your phone with wired headphones, and the sound starts crackling. You try lowering the volume, but the crackling persists. Then, you gently move the headphone cable, and the crackling changes or disappears. This means the issue is likely a loose or damaged cable, not the phone or the headphones themselves. Replacing the cable should fix the problem.
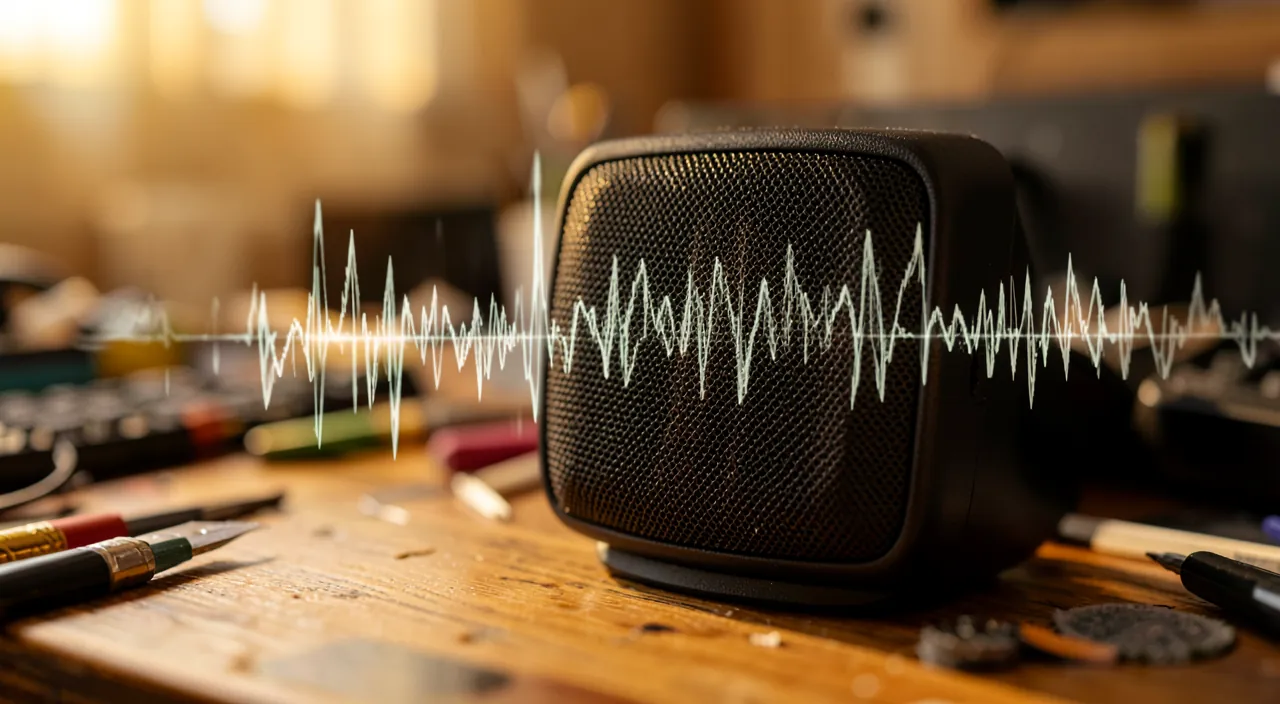
How to restore clean sound
Here’s the step-by-step process, from simplest to most involved, to fix distorted sound. LOWER the volume: First reflex for saturated sound; lower the volume (on the DEVICE AND in the app/player); sound pushed to maximum saturates; at moderate volume, it often becomes clean again; test this simple gesture first. Check BOTH volumes: Volume is often adjusted in two places; the DEVICE’s and the APPLICATION’s (or player, site); if one is at maximum and the other is low, it may saturate; balance them (e.g., moderate app, adjusted device). Revert to NEUTRAL settings: If you’ve activated an equalizer, effects, amplification, or “boost,” deactivate them or revert to NEUTRAL settings; pushed settings distort; neutral is often the cleanest. TEST another source: Listen to another file, video, or song; if the issue disappears, it was the SOURCE (poor-quality file); if it persists, it’s your hardware or settings; this test targets the cause. Check CABLES and connections: For wired sound, check the cable (damaged?), the connector (properly inserted? clean?); gently move the cable; if the sound changes, it’s the connection; clean or replace the cable; wired connections often cause crackling. Clean the CONNECTOR: A clogged connector (headphone jack, port) causes crackling; clean it gently (blow, dry cloth); dirt disrupts contact; cleaning helps. TEST another output device: Connect another headphone or speaker; if the sound is clean, your output device was the issue; if it still crackles, it’s the source or the device; this test isolates the culprit. For BLUETOOTH: Move closer to the device, reduce obstacles and interference, reconnect the Bluetooth device; wireless crackles if unstable or too far; proximity helps. Clean the SPEAKERS: If the speakers are clogged (dust, dirt), clean them gently (dry cloth, blow); dirt distorts; gentle cleaning may help; don’t wet them. RESTART the device: A restart fixes many temporary audio bugs; turn off and on; it’s simple and often effective; the restart “clears” software issues. UPDATE: Update the system and audio drivers; updates fix audio bugs; check our guides on updates; software updates stabilize sound. In summary, to restore clean sound: LOWER the volume (device AND app) — first reflex against saturation —, revert to NEUTRAL settings (deactivate equalizer, effects, boost), TEST another source (to check if it’s the file), check CABLES and connectors (move the cable, clean the port) for crackling, test another headphone/speaker to isolate the culprit, move closer for Bluetooth, gently clean the speakers, restart the device, and update. These simple checks, from easiest to most involved, fix most distorted sounds; volume, settings, and connections are the first leads.
The first reflex: lower the volume and test another source. Before suspecting a failure or dismantling anything, two ultra-simple checks solve most distorted sound issues — and they take a few seconds. First gesture, against SATURATION: lower the VOLUME. This is by far the most frequent cause of sound that “spits,” becomes harsh, and distorts: the volume is simply pushed too loud, beyond what the speaker or headphone can properly reproduce. The sound then saturates, like a voice straining until it breaks. An important point, often overlooked: volume is usually adjusted in TWO places — the DEVICE’s (the general button or slider) and the APPLICATION or player’s (the slider in the music app, video, site). If one is pushed to maximum, the sound may saturate even if the other seems reasonable. The good practice is to balance both: for example, set the app’s volume to a moderate level and then adjust with the device’s volume, rather than pushing everything to maximum everywhere. Try lowering the volume significantly: if the sound becomes clean again, you’ve found the culprit, and there’s no failure — just an excess to moderate. Second gesture, to identify the origin: test ANOTHER source. Listen to another file, video, or song, ideally from a different source. This simple test answers a crucial question: does the issue come from your hardware, or from what you’re listening to? If the distortion disappears with another source, it was the SOURCE ITSELF that was of poor quality (a saturated recording, a too-compressed file, a poor-quality stream) — and again, your hardware is fine, nothing to repair. If, on the other hand, the distortion persists on all sources, then the issue is indeed on your end (hardware, settings, or connection), and you know you need to investigate that. These two reflexes — lowering the volume, testing another source — allow you in a few seconds to distinguish the three main situations: a simple volume excess (the most common, fixed by lowering), a poor-quality source (nothing to repair, change the source), or a real hardware/setting issue (to investigate). Add a third easy gesture if you suspect CRACKLING rather than saturation: for wired sound, gently move the CABLE and check that the connector is properly inserted and clean; if the crackling changes when you manipulate the cable, the connection is the issue (damaged cable or clogged port). These common-sense checks, before any dismantling or replacement, solve the vast majority of distorted sounds. Always start with the simplest: volume, source, connection. You’ll be surprised how often the “broken” sound was just too much volume or a bad file — no hardware to change, just a setting to adjust.
Preserving high-quality sound
A few habits preserve good sound and avoid distortion; here they are. Don’t PUSH the volume to maximum: Listening permanently at maximum volume saturates the sound AND strains the hardware (and your ears); a moderate volume preserves sound quality and your speakers; moderation protects. PROTECT your ears: Beyond hardware, excessive volume is bad for HEARING; listen at a reasonable volume, take breaks; hearing health matters too; moderate to protect yourself. MAINTAIN cables: For wired sound, take care of cables (don’t twist them, don’t pull on them, store them without sharp bends); a well-maintained cable lasts longer and crackles less; maintenance extends lifespan. KEEP connectors clean: Occasionally clean connectors and ports (dust, dirt); clean contacts give a clear sound; dirt crackles; cleanliness preserves. CLEAN speakers: Gently dust off speakers occasionally; accumulated dust distorts; gentle cleaning (without wetting) maintains quality; maintenance matters. NEUTRAL settings: Keep neutral audio settings for faithful listening; excessive effects and amplification distort; adjust with moderation; neutral is often the best. KEEP updated: Keep the system and audio drivers updated; updates fix bugs and improve audio; software updates help. AVOID humidity: Humidity damages speakers and connectors (crackling, failure); protect your audio devices from water and humidity; dryness preserves. GOOD hardware lasts: Quality audio hardware, well-maintained, gives good sound for a long time; take care of it (moderate volume, well-maintained cables, cleanliness); care extends lifespan. REPLACE what’s WORN OUT: If despite everything a cable, headphone, or speaker crackles persistently (wear, damage), it may be time to replace it; worn-out hardware doesn’t always repair; replacement restores clean sound. In summary, to preserve high-quality sound: don’t push the volume to maximum (preserves sound, hardware, and ears), protect your hearing (reasonable volume, breaks), maintain cables (don’t twist them), keep connectors and speakers clean (dust them), use neutral settings, keep the system updated, avoid humidity, and replace durably worn-out hardware. These simple habits preserve clean sound and extend your hardware’s lifespan; moderation, maintenance, and cleanliness are the keys to lasting good sound.
Warning: Listening permanently at maximum volume damages the hardware AND your hearing; and persistent crackling may signal a speaker at the end of its life. Two points of vigilance deserve your attention. The first, the most important, goes beyond the simple question of sound: EXCESSIVE VOLUME is harmful to your HEARING. It’s tempting, to cover a noisy environment or “enjoy” music, to push the volume very loud, especially with headphones or earbuds. But a high volume listened to for a long time can permanently and irreversibly damage your hearing — it’s a real and cumulative risk, all the more insidious as you get used to loud volume without perceiving the danger. The saturation of the sound you’re trying to fix is actually often a signal: if the sound “spits,” it’s because the volume exceeds what’s reasonable. Adopt protective habits durably: listen at a MODERATE volume (enough to hear well, no more), take REGULAR BREAKS during long listening sessions, and be especially wary of headphones and earbuds, which send sound directly into the ear. Moderating the volume preserves both sound quality, hardware longevity, and especially your hearing, which, unlike hardware, can’t be replaced. A good rule of thumb: if you can’t hear someone speaking next to you, or if your ears “ring” after listening, the volume is too loud. Your hearing health is worth lowering the sound a bit. The second point of vigilance concerns HARDWARE: PERSISTENT crackling, which resists all simple checks, may signal a speaker or headphone at the END OF ITS LIFE. If you’ve lowered the volume, checked the cables and connectors, tested other sources and devices, restarted, and the crackling remains on a specific speaker, it may be DAMAGED — a speaker can tear, deform, or wear out over time, especially if it’s been subjected to prolonged excessive volumes (here’s yet another reason to moderate the volume: pushing a speaker to maximum permanently wears it out and eventually distorts it). A physically damaged speaker generally doesn’t “repair” with settings: if it’s a headphone or speaker, you’ll likely need to replace it; if it’s the built-in speaker of a device, a professional can assess a repair. Before getting there, make sure you’ve thoroughly eliminated simple causes: crackling due to a damaged cable or clogged port is fixed at lower cost (replace the cable, clean the port), whereas a dead speaker requires replacement. The decisive test is to listen to the same source on ANOTHER output device: if the sound is clean there, your speaker or headphone was indeed the culprit. In summary: protect your HEARING by durably moderating the volume (a health issue that goes beyond simple comfort), and interpret persistent crackling, after checks, as a possible sign of worn-out hardware to replace. Saturated sound is often a simple volume excess to fix; but chronic excessive volume, on the other hand, damages both your ears and your speakers. Moderation is the best protection for both.
Frequent questions
My sound crackles only with my headphones: where does that come from?
Probably the headphones, their cable, or their connection, not the device: test them on another device, and test another headphone on yours, to confirm; often, it’s the cable or the connector. Let’s see. The test that ISOLATES: To know if the issue comes from the headphones or the device, do two tests; connect YOUR headphones to ANOTHER DEVICE (do they still crackle?); connect OTHER headphones to YOUR device (do they crackle?); these tests identify the culprit. If your headphones crackle EVERYWHERE: If your headphones crackle on all devices, THEY (or their cable) are the issue; the problem follows them; you’ll need to check or replace them; the device is innocent. If other headphones are CLEAN: If other headphones give clean sound on your device, this confirms that YOUR headphones are the problem; the device works fine; target the headphones. The CABLE, frequent culprit: For wired headphones, the CABLE is often the issue; a twisted, worn, or damaged cable (especially near the connector, tension point) crackles; gently move the cable; if the sound changes, it’s the cable; the cable wears out over time. The CONNECTOR: The connector (jack) may be dirty or damaged; clean it gently; check that it inserts properly; poor contact crackles; the device’s port may also be clogged (clean it). For BLUETOOTH headphones: If wireless, crackling often comes from an unstable connection; move closer, reduce interference, reconnect; check the battery (low = sometimes crackling); wireless is sensitive. A DAMAGED headphone: If only one headphone crackles (not the other), it may be the speaker of that headphone that’s damaged; test it; a worn or punctured headphone crackles; replacement is sometimes necessary. The VOLUME too: Check that the crackling isn’t saturation due to too much volume (lower to test); even with headphones, excessive volume saturates; moderation may resolve. WHAT TO DO: Test to isolate (another device, other headphones), check the cable (move it) and the connector (clean), move closer in Bluetooth, lower the volume; if your headphones crackle everywhere despite everything, they’re probably worn out; consider replacement. In summary, if the sound crackles only with your headphones, the issue very likely comes from the HEADPHONES themselves (their cable or connector), not the device. Confirm it with two tests: your headphones on another device (if they crackle, it’s them), and other headphones on your device (if they’re clean, it confirms). For wired headphones, the CABLE is the most frequent culprit (worn, twisted, especially near the connector — move it to test), followed by the CONNECTOR (dirty or damaged — clean the port). For Bluetooth, look for an unstable connection (move closer, reconnect, check the battery). Also check that it’s not a simple volume excess. If your headphones crackle on all devices despite these checks, they’re probably at the end of their life: replacement will restore clean sound. Isolation tests save you from looking in the wrong place.
How to clean a speaker or port without damaging it?
Gently and DRY: Dust off with a soft dry cloth or by gently blowing, without inserting or wetting anything; gentleness and lack of humidity protect the hardware. Here are the best practices. The GOLDEN RULE: DRY and GENTLE; never wet a speaker or port (humidity damages and can cause short-circuits), and don’t force anything; gentleness is essential; audio hardware is fragile. For SPEAKER dust: Gently dust off the grille with a soft DRY cloth, or a very soft brush (like a clean paintbrush); you can gently blow to dislodge dust; don’t rub hard; gentleness preserves the membrane. BLOW gently: Gently blowing (or a brief can of compressed air at a distance) dislodges dust from grilles and ports; don’t blow too hard or too close (risk of pushing dust in or damaging); gentle blowing suffices. For a PORT (connector): A clogged headphone port is gently cleaned; blow to dislodge dust; optionally, a very gentle DRY cotton swab (without leaving fibers); don’t force anything into the port; the contact must be clean but intact. Don’t INSERT anything pointy: Never insert a pointy or metallic object into a port or speaker grille; you risk damaging the contacts or the membrane; stay on the surface, gently; the pointy damages. Don’t WET: Don’t use water, cleaning liquid, or wet wipes on a speaker or port; humidity seeps in and damages; audio cleaning is DRY; water is the enemy. TURN OFF and unplug: As a precaution, turn off and unplug the device before cleaning a port; this avoids any risk; safety first; handle unplugged. For IN-EAR headphones: The tips can be cleaned (earwax); gently remove the tip if possible, clean it dry; accumulated earwax muffles or distorts the sound; gentle regular cleaning helps. GENTLE REGULARITY: Gentle regular dusting is better than a harsh occasional cleaning; maintain often, gently; regular gentleness preserves. THE ADVICE: Always clean dry and gently (soft dry cloth, gentle blow), wet nothing, insert nothing pointy, turn off before cleaning a port; gentle regular maintenance keeps sound clean without damaging. In summary, to clean a speaker or port without damaging it: Always proceed DRY and GENTLY. Dust off the speaker grille with a soft dry cloth or a very soft brush, gently blowing to dislodge dust (without blowing too hard or too close). For a port, blow to dust it off, optionally with a very gentle dry cotton swab, without ever forcing. Absolute no-nos: Never WET (humidity damages and risks short-circuit), and never INSERT a pointy or metallic object (you’d damage the contacts or the membrane). As a precaution, turn off and unplug the device before cleaning a port. For in-ear headphones, gently clean the tips (accumulated earwax distorts the sound). Gentle regular dusting is better than occasional harsh cleaning. Gentleness and lack of humidity are the two rules that protect your audio hardware while restoring clear sound.
The sound crackles since an update or on a single app: is it software?
Probably yes: If the crackling appeared after an update or only affects one app, the cause is software; restarting, updating, or checking the app’s settings often fixes it. Let’s analyze. The sign of a SOFTWARE cause: If the sound crackles since a specific update, or only in ONE app (not others), the cause is probably SOFTWARE, not hardware; your hardware is fine (it works elsewhere); it’s the software that distorts. The test that CONFIRMS: Is the sound clean in OTHER apps? If yes, the issue is isolated to one app (so software); if the crackling is everywhere since an update, it’s a system issue; these tests locate the cause. RESTART first: A restart fixes many temporary audio bugs that appeared after an update; turn off and on; it’s the first gesture, simple and often effective; the restart “clears.” Check the APP’s settings: If only one app crackles, check ITS audio settings (internal volume, effects, equalizer, quality); an app setting may distort; revert to neutral settings in the app. UPDATE the app: If a specific app crackles, update it (a bug may have been fixed) or reinstall it; the publisher often fixes these issues; app updates help. After a SYSTEM UPDATE: If the crackling appeared after a system update, look for a MORE RECENT update (fixes often follow); or an audio driver update; publishers fix regressions; wait and update. The AUDIO DRIVERS: On computers, a faulty audio driver (after an update) causes crackling; updating or reinstalling the audio driver often fixes it; check our guides on drivers; the driver links to the hardware. CHECK system effects: Some systems have “audio enhancements” or effects enabled that distort; deactivate them to test; these pushed options may crackle; neutral is often cleaner. REPORT the bug: If the crackling clearly comes from an update and affects everyone, it’s a known bug; report it to the publisher, check if a fix is announced; you’re not alone; the fix will come. THE ADVICE: Crackling that appeared after an update or is limited to one app is almost surely SOFTWARE, not hardware; restart, check the app’s settings, update (app, system, audio drivers), deactivate effects; the solution is software. In summary, yes, crackling that appeared after an update or is limited to ONE app is very likely SOFTWARE, not hardware: your hardware is fine since it works elsewhere. Confirm it by checking if the sound is clean in other apps. The solutions are software: RESTART first (fixes many temporary bugs), check the AUDIO SETTINGS of the affected app (internal volume, effects, equalizer — revert to neutral), UPDATE the app (or reinstall it), and after a system update, look for a more recent fix or update the AUDIO DRIVERS (often the culprit on computers). Also deactivate “audio enhancements” or system effects that may distort. If the bug clearly comes from an update and affects everyone, it’s a known issue that will be fixed: report it and wait for the fix. Software-distorted sound is fixed by software — no need to suspect your hardware.
What to remember
Saturated or crackling sound is a common and usually minor issue, whose origin should be identified first. SATURATED sound (harsh, “spitting,” distorting) most often comes from TOO MUCH VOLUME or a PUSHED SETTING (equalizer, amplification, “boost”); crackling sound (crackling, interference) comes more from a FAULTY CONNECTION (damaged cable, dirty or poorly inserted connector, unstable Bluetooth), a clogged or damaged speaker, or a software issue; sometimes, it’s the SOURCE ITSELF (poor-quality file or stream) that’s the issue. The first ultra-simple reflexes solve most cases: LOWER the volume (in two places: the DEVICE AND the app — don’t push everything to maximum), revert to NEUTRAL settings (deactivate effects and amplifications), and TEST another source (if the distortion disappears, it was the file, and your hardware is fine). For crackling, check CABLES and connectors (gently move the cable: if the sound changes, it’s the connection; clean the port), test another headphone or speaker to isolate the culprit, and for Bluetooth, move closer and reconnect. Restart the device (fixes many audio bugs) and update the system and drivers — especially if the crackling appeared after an update or only affects one app, sign of a software cause. If you need to clean a speaker or port, always do it DRY and GENTLY (soft cloth, gentle blow): never wet, never insert a pointy object. Two important points of vigilance: First, listening permanently at MAXIMUM volume damages the hardware AND especially your HEARING — a durable and irreversible health issue that goes beyond comfort; moderate the volume, take breaks, be wary of headphones. Then, PERSISTENT crackling that resists all checks may signal a speaker or headphone at the end of its life (a test on another device confirms it): worn-out hardware is replaced rather than repaired. To preserve high-quality sound durably: moderate the volume, maintain cables (don’t twist them), keep connectors and speakers clean (gentle regular dusting), use neutral settings, keep the system updated, and avoid humidity. In short, distorted sound is almost always fixed by simple checks — volume, settings, source, connection — in order from easiest to most involved: start by lowering the volume and testing another source, you’ll solve most cases without replacing anything. And remember that the best protection, for your hardware and your ears, remains moderate volume.
Persistent failure, capricious device? Our remote troubleshooting service quickly resolves your issue, without jargon.
Leave a Reply
You must be logged in to post a comment.