
Did you just receive a new iPhone? Congratulations! But one question worries a lot of people: how to recover EVERYTHING that was on the old one—photos, contacts, messages, apps, settings—without losing anything? Good news: Apple has made this transfer remarkably SIMPLE. There is a « magic » method that copies almost everything from the old iPhone to the new one, simply by placing them next to each other: it’s the « Quick Start. » By following the on-screen instructions, you’ll find your new iPhone just like the old one, without being an expert. The secret: to PREPARE the old one (a backup) before starting. Let’s see how to transfer your data calmly, step by step, and how to avoid common pitfalls.
Before you start: preparing the transfer
Good preparation guarantees a loss-free transfer; here are the points to check first. MAKE a BACKUP of the old one: back up the old iPhone (iCloud or computer) first; essential safety net; crucial. CHECK iCloud space: make sure you have enough space for the backup; otherwise it fails; to check; important. CHARGE both devices: batteries well charged (or plugged in); the transfer is long; advice. A good WIFI: stable connection for the transfer/backup; avoid interruption; important. Know your APPLE ID: know your Apple ID and password; essential; to prepare. The CODE of the old one: have the unlock code of the old iPhone; requested during the transfer; to prepare. PLAN time: the transfer may take a while; don’t be in a hurry; advice. KEEP the old one on: don’t reset the old one before checking everything; security; crucial. Both DEVICES up to date: ideally up to date for optimal compatibility; advice; useful. GATHER your passwords: note down important logins; some need to be re-entered; foresight. In short, before transferring anything, good PREPARATION is the key to a stress-free and loss-free transfer. The CRUCIAL point: make a BACKUP of your OLD iPhone BEFORE anything (via iCloud, or via a computer). It’s your SAFETY NET: if anything goes wrong during the transfer, your data will be safe, ready to be restored. Never skip this step. For an iCloud backup, first check that you have enough iCLOUD SPACE (otherwise the backup fails; you may need to free up space or increase storage). Then, a few hardware checks: CHARGE both DEVICES well (or plug them in: a transfer can be long and resource-intensive), make sure you have a STABLE WiFi (the transfer and backup depend on it), and PLAN TIME (this isn’t a two-minute affair). On the information side: have your APPLE ID and PASSWORD (essential), the UNLOCK CODE of the OLD iPhone (you’ll be asked for it), and your main passwords (some services will ask you to log in again on the new device). Finally, golden rule: KEEP your OLD iPhone on and intact—don’t reset it, empty it, or especially not before you’ve CHECKED that everything has arrived on the new one. Ideally, update both devices beforehand. With this preparation, you approach the transfer with complete peace of mind.
The most important thing is to back up your old iPhone before starting. This creates a safety copy of all your data. Then, make sure both phones are charged and connected to WiFi. The transfer will take time, so don’t rush it. Keep your old phone until you’ve checked everything works on the new one.
The transfer with « Quick Start »
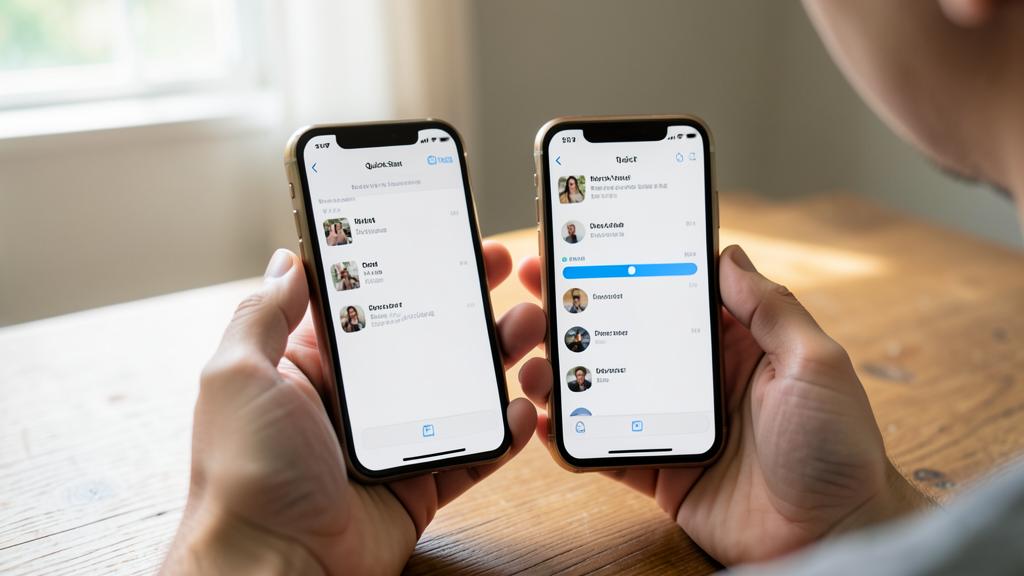
The simplest method is « Quick Start, » by placing the two iPhones side by side; here’s how. TURN ON the new iPhone: start the new iPhone (new or reset); the starting point; step. PLACE it near the old one: place the old iPhone (unlocked) very close; they « see » each other; key step. A PROMPT appears: the old one displays « Set up a new iPhone »; tap « Continue »; step. SCAN the animation: aim the old one at the small animation displayed on the new one; to associate them; step. ENTER the code: enter the code of the old iPhone on the new one; to authenticate; step. FOLLOW the instructions: let yourself be guided (Apple ID, settings); the iPhone helps; step. CHOOSE the transfer: transfer from the old one (or from an iCloud backup); start the copy; step. WAIT for the end: the transfer copies photos, apps, settings; be patient; important. KEEP both CLOSE: leave the devices near each other, plugged in; until the end; advice. CHECK at the end: check that everything has arrived; check; advice. In short, the SIMPLEST method to transfer your data is « QUICK START, » which copies your data directly from one iPhone to another by placing them SIDE BY SIDE. Step by step: 1) TURN ON your NEW iPhone (new, or freshly reset): it displays the welcome screen. 2) Bring your OLD iPhone (unlocked) very CLOSE to the new one: a PROMPT then appears on the OLD one, offering to « Set up a new iPhone » with your Apple ID; tap « CONTINUE. » 3) A small ANIMATION (a pattern) is displayed on the NEW iPhone: with the OLD one, AIM at this animation (as if taking a photo), to ASSOCIATE the two devices. 4) Enter the CODE of your old iPhone on the new one. 5) THEN FOLLOW the ON-SCREEN INSTRUCTIONS: the iPhone guides you step by step (connection to your Apple ID, choice of a few settings, terms…). 6) At the time of the transfer, CHOOSE to transfer the data FROM the OLD iPhone directly (simplest option; you can also restore from an iCloud backup). 7) The TRANSFER starts: it copies your photos, apps, settings, accounts… This may take TIME (depending on the amount of data); BE PATIENT, keeping the two devices CLOSE to each other and PLUGGED IN, until the end. 8) Once finished, CHECK that everything has arrived on the new iPhone. And there you go: your new iPhone is set up like the old one! The iPhone does most of the work; you just have to follow the instructions.
Imagine you’re transferring from an iPhone 13 to an iPhone 15. Your iPhone 13 has 120GB of data (including 5,000 photos and 200 apps). The transfer takes about 45 minutes over a strong WiFi connection. After the transfer, you notice that some apps need to redownload (about 2GB of data) which happens in the background while you use your new phone.
The magic method: « Quick Start. » Turn on the new iPhone, place the old one (unlocked) right next to it, and let yourself be guided—the two devices « recognize » each other and copy everything. The secret to a stress-free transfer: having made a backup of the old one before. Changing iPhones is scary because of one fear: « will I lose everything? » Rest assured: Apple has designed a remarkably simple transfer, and with two precautions, everything goes well. The queen method: « Quick Start. » It’s THE simplest way, almost « magical, » to transfer your data: it consists of placing your TWO iPhones (the old and the new) NEXT TO EACH OTHER, and letting them « recognize » each other to copy everything automatically. In concrete terms: turn on the NEW iPhone (it displays « Hello »), and bring your OLD iPhone (unlocked) very close. Like magic, the OLD one displays a proposal: « Set up a new iPhone? » with your Apple ID. Tap « Continue, » then follow what appears: aim a small animation with the old one (to associate the two), enter the code of the old one, log in to your Apple account… At each step, the iPhone TELLS you what to do: you just have to FOLLOW. Then you choose to transfer the data from the old one, and the transfer starts: photos, contacts, messages, apps, settings… everything is copied. You just have to WAIT (keep the devices close and plugged in). The TWO precautions that change everything. Precaution 1 (the most important): MAKE a BACKUP of the old one BEFORE. That’s the real secret to a stress-free transfer. Before you start, back up your OLD iPhone (via iCloud, in Settings → your name → iCloud → iCloud Backup → « Back up now »; or via a computer). Why? Because if anything goes wrong (interrupted transfer, issue), your data will be SAFE, and you can always restore them. With a recent backup, you RISK NOTHING: it’s your safety net. Precaution 2: DON’T GET RID of the old iPhone too soon. As long as you haven’t CHECKED, on the new iPhone, that EVERYTHING is well arrived (look at your photos, your contacts, your apps, your messages), KEEP the old iPhone INTACT: don’t reset it, don’t empty it, don’t return it, don’t sell it. It remains your « backup original » as long as the new one isn’t confirmed complete. Take your time to check before parting with it. The right mindset: let yourself BE GUIDED, be patient. The transfer may seem long, and the iPhone displays many screens: no panic, READ what appears and FOLLOW the instructions, one step at a time. You don’t need to « know » what to do in advance: the iPhone guides you. And if you get stuck, you can always get help (consult our iPhone guides). In short: « Quick Start » transfers everything by simply placing the old iPhone (unlocked) next to the new one and following the instructions; the secret to a serene transfer lies in two gestures: MAKE a BACKUP of the old one BEFORE (your safety net), and KEEP the old one intact until you’ve CHECKED that everything has arrived on the new one. With these precautions, changing iPhones is simple and risk-free—the device does most of the work.
After the transfer: checking and finalizing
Once the transfer is complete, a few checks finalize the move to the new iPhone; let’s see. CHECK the PHOTOS: make sure your photos are there; memories; priority; advice. CHECK the CONTACTS: check that your contacts are present; essential; advice. CHECK messages, apps: messages, applications, settings transferred; the main thing; advice. RECONNECT to apps: some apps ask you to reconnect (password); normal; to plan. Apps will REDOWNLOAD: they may finish installing a while after; be patient; to know. Check iMESSAGE/FaceTime: do they work with your number?; to check; useful. Move the SIM/eSIM: transfer your line (physical SIM or eSIM); to call; important. TEST the functions: calls, internet, camera; does everything work?; check; advice. KEEP the old one for a while: don’t empty it until everything is confirmed; security; crucial. ERASE the old one afterward: when everything is OK, reset the old one (before giving/selling it); privacy; advice. In short, once the transfer is DONE, take the time to CHECK and FINALIZE before considering the operation successful. Priority checks: are your PHOTOS there (your memories: look)? are your CONTACTS present? have your MESSAGES, your APPS, and your SETTINGS followed? Review the essentials. A few NORMAL points to anticipate: some APPS will ask you to RECONNECT (retype your password: it’s normal, for your security); apps may take a while to finish REDOWNLOADING/installing after the transfer (be patient, they complete themselves); and check that iMESSAGE and FaceTime work well with your number. IMPORTANT point for calling: don’t forget to transfer your PHONE LINE to the new iPhone—either by moving the PHYSICAL SIM card, or by transferring your eSIM (the new iPhone often guides you for this): otherwise, you won’t be able to make calls. TEST the key functions: make a call, check the internet, the camera, the WiFi. Golden rule: KEEP your OLD iPhone for a while (a few days), as long as you’re not SURE that EVERYTHING has passed and works on the new one—it remains your security. It’s only once EVERYTHING is confirmed that you can ERASE (reset) the old iPhone, which is essential BEFORE giving it, selling it, or returning it (to erase all your personal data—consult our guides on security). By taking this time to check, you finalize the move to your new iPhone with complete confidence.
Warning: never reset and never sell the old iPhone before checking that everything is on the new one. Make a backup before starting, and beware of activation lock which can block a device. A few essential warnings for a transfer without bad surprises. First point (the most important): DON’T EMPTY the old iPhone too early. That’s the mistake NOT to make: resetting, erasing, selling, or returning your OLD iPhone BEFORE carefully CHECKING that EVERYTHING is well arrived and working on the new one. As long as you haven’t confirmed that your photos, contacts, messages, and apps are well there (and tested the functions), KEEP the old iPhone INTACT and on; it’s your backup original. Once the old one is erased, there’s no going back. Wait until you’re totally sure. Second point: make a BACKUP before starting. Don’t rely ONLY on the direct transfer: first, make a BACKUP of the old iPhone (iCloud or computer). Thus, even in case of an issue during the transfer, your data are safe and restorable. It’s the transfer’s seatbelt. Third point: beware of ACTIVATION LOCK (Apple ID). An iPhone is linked to your APPLE ID by an anti-theft security (the « activation lock »). Consequences to know: to set up the new iPhone, you MUST know your Apple ID and password (don’t forget them!); and before giving/selling the old one, you must DEACTIVATE it properly (disconnect it from your account / reset it properly), otherwise it will remain LOCKED to your name and unusable for the next person. Never give an iPhone to someone without having properly disconnected it from your account and erased it. Fourth point: some things don’t transfer « all by themselves. » The transfer copies the essentials, but stay attentive: some applications will ask for a RECONNECTION (passwords: have them), some security-related content (authentication app codes, some payment cards, some passwords) may require manual reconfiguration, and your PHONE LINE (SIM/eSIM) must be transferred. Plan to have your important passwords at hand. Fifth point: don’t interrupt the transfer in progress. While the data is copying, LEAVE the two devices alone, CLOSE to each other and PLUGGED IN: don’t move them, don’t turn them off, don’t cut the WiFi. Interrupting a transfer in progress may force it to restart (and, in the worst case, leave the new iPhone half-configured). Be patient until the end. Sixth point: iCloud space and mobile data. If you go through an iCloud backup, INSUFFICIENT iCloud space can block the backup (free up space or increase storage). And do the transfer over WiFi (not mobile data: the volume is huge and would exhaust your plan). Seventh point: in case of doubt, get help. If you’re not comfortable, or if something doesn’t go as planned, don’t force it and don’t tinker in panic: rely on the on-screen instructions, or get accompanied (consult our iPhone guides, or ask for help from a loved one or a professional). In short: NEVER reset/sell the old iPhone before checking that everything is on the new one (keep it intact as a backup), make a BACKUP before starting, know your Apple ID and properly disconnect the old one from the account before giving it away (activation lock), plan your passwords for apps to reconnect and transfer your line (SIM/eSIM), don’t interrupt the transfer in progress (devices close, plugged in, on WiFi), and get help in case of doubt. With these precautions, changing iPhones goes smoothly.
Frequently asked questions
Will I lose my photos and contacts when changing iPhones?
No, if you follow the right method: the transfer (Quick Start) copies your photos, contacts, messages, and apps to the new iPhone; and provided you’ve backed up the old one beforehand, you risk nothing—your data are in duplicate until you check. Let’s see. No, NO LOSS: the right method copies everything; reassuring; important. The TRANSFER copies: photos, contacts, messages, apps go to the new one; the essentials follow; to know. The BACKUP as a safety net: with a backup of the old one, nothing is lost even in case of an issue; security; crucial. Data in DUPLICATE: during the transfer, everything exists on both; no disappearance; reassuring. KEEP the old one: as long as not checked, the old one keeps everything; backup original; advice. CHECK afterward: check photos/contacts on the new one; confirm; advice. The PHOTOS via iCloud: if your photos are in iCloud, they come back by themselves; practical; to know. The CONTACTS synchronized: often linked to the Apple account, they follow; reliable; to know. The UNFOUNDED FEAR: well done, the change doesn’t make you lose anything; reassure yourself; key message. DON’T empty the old one too soon: the only real mistake would be to erase the old one before checking; to avoid; crucial. The ADVICE: no; the transfer copies photos, contacts, messages, apps; with a backup of the old one made beforehand, you risk nothing (data in duplicate); check on the new one and keep the old one until confirmed. In short, NO, you will NOT lose your photos or contacts when changing iPhones—provided you follow the right method, which is simple. Reassure yourself, it’s everyone’s #1 fear, and it’s UNFOUNDED when done correctly. Here’s why. The TRANSFER (the « Quick Start ») COPIES your data from the old to the new iPhone: your PHOTOS, your CONTACTS, your MESSAGES, your APPLICATIONS, and your settings are copied to the new one. The important word is « COPY »: during the transfer, your data do NOT DISAPPEAR from the old one—they exist in DUPLICATE, on both devices. You don’t « move » anything fragile; you DUPLICATE. Moreover, if you’ve made a BACKUP of the old iPhone BEFORE starting (which is highly recommended), you have an ADDITIONAL SAFETY NET: even in case of an issue, everything is recoverable. Note: if your photos are in iCLOUD and your contacts synchronized with your Apple account (which is common), they come back by themselves on the new iPhone as soon as you log in to your account—even simpler. The ONLY real way to lose data would be to ERASE (reset) or get rid of the OLD iPhone BEFORE checking that everything has arrived on the new one. So: after the transfer, CHECK (look at your photos, your contacts on the new iPhone), and KEEP the old one intact until you’re sure. By proceeding this way, it’s IMPOSSIBLE to lose anything. In short: no, you will not lose your photos or contacts; the transfer copies them to the new iPhone (they exist in duplicate during the operation), a prior backup of the old one protects you in addition, and iCloud photos and synchronized contacts come back by themselves; just check on the new one and keep the old one until it’s confirmed. The fear is natural, but well done, changing iPhones doesn’t make you lose anything.
Does the transfer work if I no longer have my old iPhone?
Yes, provided you have a BACKUP: if you no longer have (or access to) the old iPhone, you can set up the new one by RESTORING from your last iCloud backup (or a computer backup); hence the crucial importance of backing up regularly. Let’s see. The BACKUP saves: without the old one, a backup allows you to recover everything; the essential safety net; crucial. RESTORE from iCloud: at the startup of the new one, choose « restore from iCloud »; recover your data; method; useful. From a COMPUTER: a backup made on a computer also works; alternative; to know. Without a backup, DIFFICULT: without the old one NOR backup, you don’t recover much; hence the importance of making them; lesson. The iCLOUD data come back: photos/contacts synchronized come back via the account; partially saved; to know. BACKUP regularly: the real solution is to back up often; anticipate loss/breakage; key advice. In case of BREAKAGE/theft: a recent backup saves the situation; reassuring; important. LOG IN to the account: enter your Apple ID on the new one; retrieve what is linked to the account; step. CHECK afterward: check what has come back; some things may be missing; advice. The LESSON: backing up regularly protects you from everything; to remember; key message. The ADVICE: yes, if you have a backup; restore the new one from your iCloud (or computer) backup; without the old one nor backup, recovery is very limited; hence the importance of backing up often. In short, YES, the transfer remains possible even if you NO LONGER have your old iPhone (lost, broken, stolen, already returned)—but with ONE essential condition: having a BACKUP. That’s when you realize the importance of backing up regularly. If you have a BACKUP of your old iPhone (an iCLOUD backup, or a backup made on a COMPUTER), you DON’T need the old physical device to set up the new one: when setting up the new iPhone, simply choose the option « RESTORE from an iCloud backup » (or from the computer), log in to your Apple ID, and the new iPhone RECUPERATES your data from this backup. That’s how you get out of it after a breakage or theft, provided you have a RECENT backup. Moreover, everything that was synchronized with your Apple account / iCLOUD (often your photos and contacts) comes back by itself as soon as you log in to your account on the new iPhone. INSTEAD, if you have NEITHER the old iPhone, NOR any backup, the situation is much more difficult: you will only be able to recover what was eventually in iCloud/linked to your account, and you will lose the rest (what was stored ONLY on the old device). That’s the big LESSON to remember: BACK UP your iPhone REGULARLY (the ideal being an automatic iCloud backup). Thus, whatever happens to your device (breakage, loss, theft), your data are safe and recoverable on a new iPhone. It’s your best protection. In short: yes, you can set up a new iPhone without the old one, by RESTORING from a backup (iCloud or computer), and the data synchronized with your account come back by themselves; but without the old one NOR backup, recovery is very limited—hence the crucial importance of backing up regularly. The backup is what makes changing iPhones serene in all circumstances.
How long does the transfer take?
It depends on the AMOUNT of data (especially photos and videos) and the method: from a few tens of minutes to an hour or more for a lot of data; plan time, keep the devices plugged in, and know that some apps will finish downloading after. Let’s see. It DEPENDS on the data: the more you have photos/videos/apps, the longer it takes; logical; to know. From TENS of minutes to more: often count from 30 minutes to an hour or more; order of magnitude; reference. The PHOTOS/videos weigh: they are the bulk of the volume; hence the duration; to know. The METHOD matters: direct transfer or via iCloud, faster or slower WiFi; it varies; nuance. PLAN time: don’t start this if you’re in a hurry; choose a good time; advice. KEEP plugged in: devices charged/plugged in during; avoid interruption; important. The APPS after: they finish downloading once the main part is done; be patient a little longer; to know. USABLE progressively: the phone becomes usable, the rest completes itself; practical; to know. A good WIFI speeds it up: a fast connection reduces the time; useful; advice. PATIENCE: let it go until the end; don’t interrupt; advice. The ADVICE: it depends on the amount of data (especially photos/videos); from a few tens of minutes to more than an hour; plan time, keep plugged in, and the apps will finish after; don’t interrupt. In short, the DURATION of the transfer VARIES—there is no fixed time—and depends mainly on the AMOUNT of DATA to copy and the method/connection. As a rough estimate, count from a few TENS of MINUTES to more than an HOUR if you have a lot of data. The main factor: the VOLUME of your PHOTOS and VIDEOS (they are the heaviest; someone with thousands of photos and long videos will have a much longer transfer than someone who has few). The METHOD and the CONNECTION also play a role: a direct transfer between the two iPhones, or a restoration from iCloud, on a faster or slower WiFi, will take more or less time. What to remember in practice: 1) PLAN TIME—don’t start a transfer if you have to leave in ten minutes; choose a quiet time (in the evening, for example). 2) KEEP the devices PLUGGED IN (or well charged) during the entire operation: a transfer is resource-intensive, and you don’t want a device to turn off halfway through. 3) Know that the transfer happens in TWO stages: first the bulk of the data (photos, settings…), then the APPS that finish REDOWNLOADING AFTER (in the background, once the main transfer is finished): it’s normal if some apps take a while to install completely. Good news: your new iPhone becomes USABLE quite quickly (as soon as the bulk of the transfer is done), and the rest completes itself progressively. A good WiFi SPEEDS things up. The key word: PATIENCE—let the transfer go to the end without interrupting it. In short: the transfer takes from a few tens of minutes to more than an hour depending on the amount of data (especially photos/videos) and the connection; plan time, keep the devices plugged in, don’t interrupt it, and know that the apps will finish downloading after (the phone being usable progressively). A little patience, and your new iPhone will be ready, just like you.
What to remember
Changing iPhones makes you fear « losing everything, » but rest assured: Apple has made data transfer remarkably SIMPLE, and with the right precautions, it goes smoothly. The queen method is « QUICK START »: turn on the new iPhone, place the old one (unlocked) right NEXT TO it, and let yourself BE GUIDED—the two devices « recognize » each other and copy everything (photos, contacts, messages, apps, settings). You just have to follow the on-screen instructions, one step at a time. But the real secret to a SERENE transfer lies in two gestures. First: MAKE a BACKUP of the old iPhone BEFORE starting (via iCloud or a computer)—it’s your safety net, which protects you whatever happens (and even allows you to set up the new one if you NO LONGER have the old one, after a breakage or theft). Second: KEEP the old iPhone INTACT until you’ve CHECKED that everything has arrived on the new one (look at your photos, contacts, messages, apps; test calls, internet)—don’t reset it, don’t sell it, don’t return it ESPECIALLY NOT before this confirmation. During the transfer: prepare your Apple ID and password, the code of the old one, charge both devices, use a good WiFi, plan time (from a few tens of minutes to more than an hour depending on your data), and don’t interrupt the operation (devices close and plugged in). After: transfer your line (SIM/eSIM) to call, reconnect to the apps that ask for it (have your passwords), and let the apps finish downloading. Points of vigilance: know your Apple ID and PROPERLY DISCONNECT the old one from your account before giving it away (otherwise the « activation lock » will block it), and don’t erase the old one until EVERYTHING is confirmed (essential before giving/selling it, for your privacy). In short, transferring to a new iPhone is within everyone’s reach: the device does most of the work via Quick Start, and you just have to back up beforehand, follow the instructions, and keep the old one until verification—to find, on your new iPhone, everything that’s dear to you, without losing anything and without stress.
Want to unlock the full potential of your iPhone, iPad, or Mac? Our Apple training courses will take you to the next level.
Leave a Reply
You must be logged in to post a comment.