
You start a video conference, and your interlocutor barely sees you: your image is DARK, your face in the shadow, almost a silhouette. It’s embarrassing for an interview, a call with the family, or a work meeting. Good news: a webcam that gives a dark image is a very common problem, and it rarely comes from a defect in the camera itself. The main cause is almost always the LIGHT: a webcam needs much more light than one might think, and especially light that is well PLACED (in front of you, not behind). By improving the lighting and avoiding a few classic pitfalls, you can radically transform the image, without buying anything. Let’s see why the webcam gives a dark image, how to easily brighten it, and when the settings or hardware come into play.
Why the webcam gives a dark image
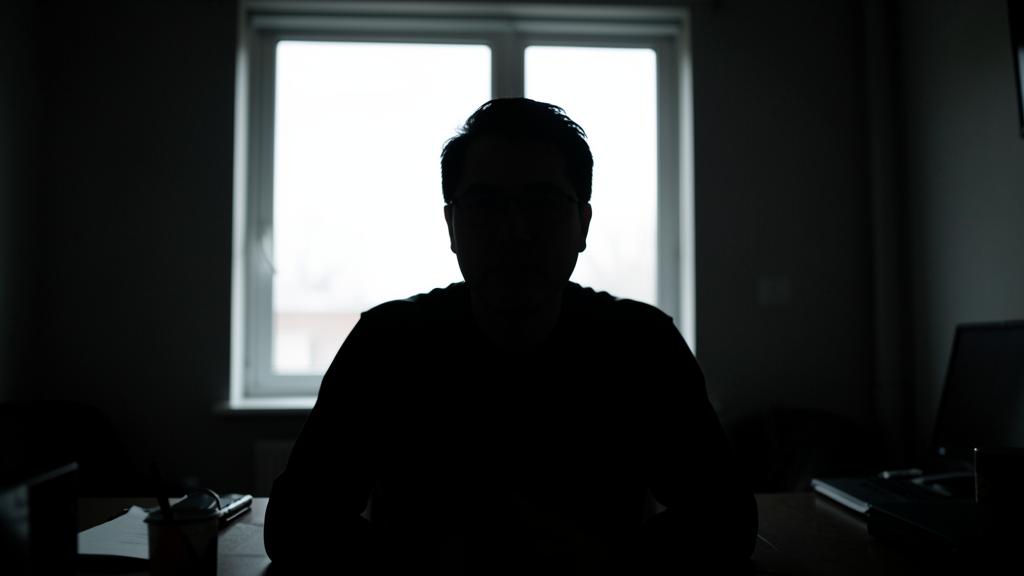
Understanding the origin of the dark image helps to correct it; let’s see the causes. The lack of LIGHT: a webcam needs a lot of light; in short supply, the image is dark; the #1 cause; frequent. The light BEHIND you (backlight): a window/light in your back; the camera adjusts to the bright background and darkens you; the classic trap; very frequent. A webcam LESS sensitive: some webcams (especially built-in/older ones) handle low light poorly; the image is dark; hardware; common. The AUTO setting fooled: the webcam automatically adjusts the exposure; a bright or contrasting background fools it; hence the dark face; mechanism. A DIRTY lens: the small lens covered with dust/smudges; dull/dark image; to clean; possible. A PROTECTION/cover: a poorly opened webcam cover; very dark/black image; to check; frequent. The DARK room: a poorly lit environment; not enough light for the camera; to lighten; common. A bad SETTING: webcam brightness set too low (in the app); to adjust; possible. The VISIO app: some apps have their own image settings; to check; possible. The EVENING/gray weather: less natural light; darker image; to compensate; to know. In summary, if your webcam gives a dark image, the cause is almost always the LIGHT — and rarely a defect in the camera. Two causes dominate. First, the simple lack of LIGHT: a webcam needs MUCH more light than the human eye (which, for its part, adapts very well to dim light); in a room that you find « normally lit, » the webcam, on the other hand, lacks light and produces a dark image. Then — and this is THE classic trap — the light placed BEHIND you: if a WINDOW or a LAMP is in your BACK (BACKLIT), the webcam automatically adjusts its exposure to this bright background, and you are thus plunged into the SHADOW (you become a dark silhouette in front of a bright background). Other causes: a LESS SENSITIVE webcam (built-in or older webcams handle low light poorly), the automatic exposure setting FOOLED by a bright or contrasting background, a DIRTY lens (the small lens covered with dust or smudges), a COVER of the webcam poorly opened (which darkens or blacks out the image), a TOO DARK room, or a BRIGHTNESS setting too low in the app. The good news: most of these causes can be corrected without buying anything, just by taking care of the light. Let’s see how.
A webcam needs a lot of light to work well. If your room seems bright to you, it might not be enough for the camera. The biggest problem is when a light (like a window) is behind you, making your face dark. The solution is to put the light in front of you, like a lamp or a window facing you.
Imagine you’re using a Logitech C920 webcam in a room with a large window behind you. The camera adjusts to the bright window, making your face dark. If you turn your chair to face the window, your face gets enough light, and the image becomes clear. No extra cost, just a simple change in position.
How to brighten the webcam image
Here are the steps for a brighter image, from the simplest to the most refined; let’s follow them. PUT the light IN FRONT of you: place the light source FACING you (behind the screen), not behind you; the #1 move; very effective. Avoid BACKLIGHT: don’t sit with your back to a window; close the curtain or turn around; remove the bright background; essential. ADD more light: turn on lamps, bring one closer; more light = clearer image; effective; useful. Sit FACING a window: during the day, sit facing the window (it lights you up); free natural light; clever; useful. CHECK the webcam cover: make sure no cover/flap is covering the lens; black image → closed cover; to check; frequent. CLEAN the lens: wipe the small lens with a soft cloth; remove dust/smudges; simple; useful. ADJUST the brightness (app): in the video app, look for a brightness/exposure setting; adjust the image; useful. Light up the BACKGROUND too: a not-too-dark background helps the balance; harmonize; tip. A DESK LAMP: a lamp placed near the screen, aimed at you, works wonders; simple solution; effective. TEST before the call: check your image before the video call (preview); correct in time; clever; tip. In summary, to brighten the image of your webcam, the ROI move is to properly PLACE the light: put your light source IN FRONT of you (behind or next to the screen, facing your face), and NEVER behind you. Essential corollary: AVOID BACKLIGHT — don’t sit with your back to a window or a lamp (close the curtain, or turn around to have the window in front of you). Free daytime tip: sit FACING a WINDOW, which lights you up nicely. Then, ADD more light if needed: turn on several lamps, or (very effective) place a DESK LAMP near the screen, aimed at your face — this transforms the image. Quick checks not to forget: make sure no COVER or webcam flap is covering the lens (a completely black image often comes from this), and CLEAN the small lens with a soft cloth (dust and smudges dull the image). Finally, explore the SETTINGS: in your video conferencing app, look for a BRIGHTNESS or exposure setting (some apps offer this, or an option « adjust for low light »). The clever reflex: TEST your image BEFORE the call (via the app’s preview) to adjust the light in time. With light well placed in front of you, the dark image gives way to a clear and bright face — without buying anything.
- PUT the light IN FRONT of you
- Avoid BACKLIGHT
- ADD more light
- Sit FACING a window
- CHECK the webcam cover
- CLEAN the lens
- ADJUST the brightness (app)
- Light up the BACKGROUND too
- A DESK LAMP
- TEST before the call
The key to a bright image: light IN FRONT of you, never behind. Don’t sit with your back to a window (it’s the backlight that darkens you) — turn around to have it in front of you. The secret to a webcam that gives a beautiful clear image is not in the camera, but in the LIGHT — and more precisely in its PLACEMENT. Understand principle #1: the light must come from IN FRONT of you, to light up your FACE. A webcam needs light on what it films (you); if this light comes from the FRONT (from the screen, a window, or a lamp placed in front of you), your face is well lit, and the image is clear and flattering. It’s as simple as that. The #1 trap to avoid absolutely: BACKLIGHT. This is THE big mistake, the one that explains the vast majority of dark images. If you have a light source BEHIND you — typically, you are sitting with your back to a WINDOW, or to a lamp — here’s what happens: the webcam sees a very BRIGHT background (the window), and to avoid « blowing out » this background, it automatically adjusts its exposure accordingly… which plunges your FACE (less lit than the window) into the SHADOW. Result: you appear as a DARK SILHOUETTE in front of a bright background. The solution is immediate and free: TURN AROUND. Position yourself so that the window (or the lamp) is IN FRONT of you, not behind you. Suddenly, the light illuminates your face instead of lighting you from behind, and the image becomes clear. If you can’t move your workstation, CLOSE the curtain or the shutter of the window that is behind you (to remove this too-bright background that fools the camera), and add a light in front of you. The move that changes everything: a DESK LAMP in front of you. If your room lacks light, or for a really crisp result, place a simple LAMP (a desk lamp, for example) NEAR your screen, ORIENTED toward your FACE (not directly at the camera, which would dazzle it: toward you). This front light works WONDERS: it evenly illuminates your face, eliminates shadows, and gives a professional image — for the cost of a lamp you probably already have. Ideal daytime tip: sit FACING a WINDOW (natural daylight, soft and abundant, is the best of lights: it lights you up for free and beautifully). Three quick checks before any call: 1) no WEB CAM COVER is blocking the lens (otherwise black image); 2) the small LENS is clean (a quick wipe with a soft cloth); 3) do a TEST in the app’s preview to see your image and adjust the light BEFORE others see you. In summary: for a bright image, put the light IN FRONT of you (facing your face), and NEVER behind (the backlight of a window in your back is the #1 cause of dark images: turn around to have it in front of you, or close the curtain). Add a desk lamp aimed at you if needed, sit facing a window during the day, and check the cover and cleanliness of the lens. With the light in the right place, your webcam reveals a clear and sharp face — without spending a dime.
When the settings or hardware come into play
If the light is good but the image remains dark, the settings or hardware may be at fault; let’s see. The APP SETTINGS: look for brightness/exposure/ »low light » in the video app; adjusting may help; useful. The WEBCAM settings: some webcams have a settings software (brightness, manual exposure); to explore; possible. The AUTO exposure fooled: if the auto darkens you because of the background, manually adjusting (if possible) helps; advanced; option. A WEAK BUILT-IN webcam: laptop webcams are often mediocre in low light; good lighting compensates; to know. An EXTERNAL webcam: a quality external webcam gives a much better image; useful investment if frequent video calls; option. Using your PHONE: the phone camera is often better; you can use it for video calls; alternative; tip. UPDATE: update the app and the system; fixes camera issues; tip. Test another APP: if only one app darkens, it’s its settings; compare; diagnosis; useful. A DEDICATED LIGHT: for frequent video calls, a small « ring light » helps a lot; comfort option; useful. LIGHT first: before buying, take care of the light (free and often sufficient); priority; tip. In summary, if you have properly taken care of the LIGHT (in front of you, no backlight) but the image remains DARK, the SETTINGS or HARDWARE may come into play. On the SETTINGS side: explore the options of your video app (look for « brightness, » « exposure, » or an option « adjust for low light »); some WEBCAMS also have their own settings software (brightness, or even manual exposure to bypass the auto that darkens you). Remember to UPDATE the app and the system (this sometimes fixes camera issues), and TEST another APP: if only one darkens, the problem comes from ITS settings. On the HARDWARE side: know that BUILT-IN webcams on laptops are often mediocre in low light (good front lighting compensates for their limitations). If you do FREQUENT video calls and the image remains disappointing, two options: use your PHONE CAMERA (often much better: apps allow you to use it as a webcam), or invest in a QUALITY EXTERNAL webcam (significantly better), or even a small dedicated lighting lamp (« ring light »). But remember the PRIORITY: before buying anything, TAKE CARE OF THE LIGHT — it’s free, and it’s often sufficient to get a beautiful image, even with a modest webcam. Hardware comes only as a complement to already well-placed light.
Warning: if the image is completely BLACK (not just dark), first check the webcam cover and the app’s permissions. And don’t set the brightness to maximum, the image would become grainy. A few precautions and pitfalls to know with a dark webcam. First point: distinguish DARK image and completely BLACK image. If your image is simply too dark (you are barely visible, but poorly lit), it’s a LIGHT problem, treated above. But if the image is TOTALLY BLACK (nothing at all, black screen), the cause is often different: first check that a WEB CAM COVER (a small sliding flap, present on many computers, or a sticker cover you may have put for privacy) is not CLOSED in front of the lens — this is a very common cause of black image, and it’s enough to open it. Then check that the app has the PERMISSION to access the camera (in the privacy/camera settings), and that no OTHER app is already using the camera (only one app at a time can access it: close the others). Second point: don’t set the brightness TO MAXIMUM. If you increase the brightness/exposure in the settings, do it with MEASURE: pushed too hard, the image becomes GRAINY (full of « noise, » small grains), washed out, and not more beautiful for all that. It’s ALWAYS better to add REAL light (a lamp in front of you) than to force the setting: real light gives a clean and sharp image, while the setting pushed to the extreme degrades the quality. So adjust with moderation, as a complement to the light. Third point: beware of dazzling and harsh shadows. When adding a lamp, don’t point it DIRECTLY at the lens (this dazzles the camera and ruins the image), or in too harsh light from the side (which creates harsh shadows on the face): aim it at YOU, ideally a soft and diffused light (a lamp with a lampshade, or the natural light of a veiled window). Too direct light is almost as unflattering as not enough light. Fourth point: beware of « filters » and automatic retouching. Some apps offer « beautify » or « retouch » filters that artificially brighten: this can help in a pinch, but often gives an artificial result (smoothened face, false colors). Good natural light is still preferable. Fifth point: don’t confuse a dark webcam and a CONNECTION problem. Sometimes, a poor-quality image (dark, blurry, jerky) comes from a WEAK internet connection (the app degrades the image to keep up): if your image is bad AND jerky, check your connection too (consult our guides on troubleshooting the connection). Sixth point: before concluding that your webcam is « bad » or replacing it, TEST it with GOOD front lighting. Many people think their webcam is faulty when it just lacked well-placed light: with good lighting, the same webcam often gives a perfectly acceptable image. Don’t spend money before trying the light. In summary: distinguish dark image (light problem) and completely BLACK image (check the webcam cover, app permissions, and that no other app is using the camera), don’t set the brightness to maximum (the image becomes grainy: add real light instead), aim the lamp at you with soft light (not at the lens, not too harsh), beware of artificial filters, check your connection if the image is also jerky, and test your webcam with good light before judging it « bad. » With these precautions, you get a beautiful image without being disappointed or spending unnecessarily.
Frequent questions
Why is my face dark when the room seems well lit to me?
For two reasons: first, a webcam needs much more light than your eye (which adapts to dim light); then and above all, if a light source is BEHIND you (backlight), the camera adjusts to this bright background and plunges you into shadow: put the light in front of you. Let’s see. The EYE adapts: your eye handles dim light very well; the room seems bright to you; but the webcam, no; the key nuance; important. The webcam needs MORE: a webcam requires much more light than the eye; what’s enough for you isn’t enough for it; to know. The BACKLIGHT: if the light is behind you (window in your back); the camera adjusts to the bright background; and darkens you; the real cause often; frequent. The AUTO exposure: the camera balances according to the whole; a very bright background pushes it to darken the rest; hence your dark face; mechanism. A SILHOUETTE: result, you appear in shadow in front of a bright background; typical of backlight; to recognize. The light IN FRONT: put the source facing you; your face lights up; the solution; tip. TURN the workstation: put the window in front, not in your back; free and effective; useful. ADD a lamp: a lamp in front of you compensates for the lack; simple; effective. The « bright » room deceives: don’t trust your feeling; trust the webcam preview; tip. TEST the preview: look at your image in the app and adjust; real control; useful. The TIP: the webcam needs more light than your eye, and backlight (light behind you) darkens you; put the light IN FRONT of you (window in front, desk lamp), and trust the preview, not your feeling. In summary, your face is dark even though the room seems well lit to you for TWO reasons that often combine. First reason: your EYE and a WEBCAM don’t « see » the same way. Your eye is extraordinary for ADAPTING to dim light: a room that you find « well lit » may actually be quite dark for a camera, which, for its part, needs MUCH MORE light to produce a clear image. So don’t trust your FEELING of brightness: what’s enough for your eye isn’t enough for the webcam. Second reason (often the main one): BACKLIGHT. If an important light source is BEHIND you — the classic case being a WINDOW in your BACK — the webcam sees a very BRIGHT background. Its automatic exposure setting then adjusts to this BRIGHT background (to avoid overexposing it), which has the effect of plunging your FACE, less lit, into the SHADOW. You appear as a DARK SILHOUETTE in front of a bright background. This is the #1 trap, and it explains a huge part of dark images, even in a « bright » room. The solutions: put the LIGHT IN FRONT of you. Concretely, TURN your workstation to have the window IN FRONT of you (it then lights up your face, for free) rather than in your back; or close the curtain behind you and ADD a lamp in front of you. And above all, TEST your image in the APP PREVIEW (not with the naked eye in the room): this is the only way to see what the webcam really renders, and to adjust accordingly. In summary: your face is dark despite a « bright » room because the webcam needs much more light than your eye, and especially because backlight (light behind you) pushes it to darken you; put the light IN FRONT of you (window in front, desk lamp), and trust the webcam preview rather than your feeling. The problem comes from the light, not from you or the camera.
Do you need to buy a special lamp for video calls?
Not necessarily: start by properly PLACING the light you already have (in front of you, not behind) and by adding a simple desk lamp aimed at your face; this is often enough. A dedicated lamp is only useful if you do frequent video calls and want an optimal result. Let’s see. FIRST the placement: before buying, properly place the existing light (in front of you); free and often sufficient; priority; tip. A DESK LAMP is enough: a lamp you already have, aimed at you, works very well; no need for special; reassuring. DAYLIGHT: during the day, a window in front is the best light, free; unbeatable; clever. TEST the RESULT: with these tips, look at the preview; often it’s already good; control; tip. The DEDICATED LAMP, for whom: it’s useful if frequent video calls (work, online classes) and demand for quality; comfort option; nuance. The « RING LIGHT »: a circular lamp gives soft and flattering light; practical for many video calls; option. NOT ESSENTIAL: for occasional use, no need to invest; the free tips are enough; reassuring. A MODEST BUDGET: if you want one, there are affordable ones; accessible; to know. COMBINE: the best light = several soft sources in front of you; harmonious; tip. The PRIORITY: well-placed light matters more than hardware; take care of that first; essential. The TIP: not necessarily; first properly place your light (in front of you) and add a desk lamp aimed at you (often sufficient); a dedicated lamp is only useful for frequent video calls with quality demand. In summary, NO, you DON’T NEED to buy a special lamp to have a good image in video calls — at least, not before trying the free solutions, which are sufficient in the vast majority of cases. ALWAYS start with the PLACEMENT of the light you ALREADY HAVE: put your light source IN FRONT of you (not behind), turn around to face a WINDOW during the day (natural light is the best, and it’s free), and if needed, take a simple DESK LAMP (which you probably have) and AIM it at your face: this already radically transforms the image. Test the result in the app’s preview: most of the time, with well-placed light, it’s already quite GOOD, without buying anything. So, when is a DEDICATED LAMP (like a « ring light, » these circular lamps that give soft and flattering light) useful? Only if you do FREQUENT and important video calls (daily telecommuting, online classes, regular interviews, video creation) and you want a really OPTIMAL and consistent result (whatever the time, even in the evening without natural light). In this case, a dedicated lamp is a small appreciated comfort — and there are affordable ones. But for OCCASIONAL use (a call with the family from time to time, a punctual video call), it’s perfectly USELESS: the free tips do the job. The golden rule: WELL-PLACED light matters much more than hardware. A modest webcam with good front light beats a good webcam with backlight. So first take care of the placement (free), and only think about buying a lamp if your needs really justify it. In summary: not necessarily; first properly place the light you have (in front of you, window in front during the day, desk lamp aimed at you) — often sufficient and free; a dedicated lamp only justifies itself for frequent video calls with quality demand. Start with the free, it will surprise you.
The image is good elsewhere but dark in one app, why?
If your webcam gives a good image in some apps but dark in ONE only, the problem comes from the SETTINGS of this app (a brightness/exposure setting, or a particular image processing): explore its video settings, update it, or adjust its brightness. Let’s see. The LOCALIZED issue: if only one app darkens, it’s neither the webcam nor the light; it’s this app; key diagnosis; important. Its VIDEO settings: the app may have a brightness/exposure setting poorly adjusted; to adjust; useful. An IMAGE processing: some apps apply their own processing (filters, correction); which can darken; to check; possible. Explore the OPTIONS: look in the app’s video settings for a brightness option or « low light »; adjust; tip. UPDATE the app: an updated version fixes image bugs; useful; tip. COMPARE the apps: test the webcam in another app (preview, other video call); confirms that it’s indeed the app at fault; useful. The PERMISSIONS: check that the app fully accesses the camera; possible; to see. REINSTALL the app: if it persists, reinstalling may help; last resort; option. A MEMORIZED setting: the app may have kept a dark setting from a previous time; to reset; possible. The webcam IS FINE: rest assured, your hardware works (since it’s good elsewhere); it’s software; reassuring. The TIP: if only one app darkens, the issue comes from ITS settings (brightness/exposure, image processing); explore its video options, adjust the brightness, update it; your webcam is fine. In summary, if your image is GOOD elsewhere (in the device preview, in other apps) but DARK in ONE APP only, this is very useful information: the problem comes NEITHER from your webcam (it works, since it gives a good image elsewhere), NOR from your light (it’s correct elsewhere) — it comes from the SETTINGS of this PARTICULAR APP. This is rather reassuring, since your hardware is fine. What’s happening? Each video conferencing app has its OWN video settings and can apply its OWN image processing. It’s likely that this app has: either a BRIGHTNESS/EXPOSURE setting poorly positioned (too low), or an AUTOMATIC PROCESSING (a filter, a « correction, » a mode) that darkens your image, or a DARK setting memorized from a previous session. What you can do: 1) EXPLORE the VIDEO SETTINGS of this app: look for a BRIGHTNESS, EXPOSURE option, or a « adjust for low light » / « improve video » mode, and adjust it. Deactivate any filters or effects. 2) UPDATE the app (a recent version fixes image and camera bugs). 3) CHECK the app’s PERMISSIONS on the camera (that it fully accesses it). 4) If nothing works, REINSTALL the app (to start with clean settings). To CONFIRM the diagnosis, simply compare: does the same webcam give a good image in the system preview or another video app? If yes, it’s indeed the faulty app that needs to be fixed. In summary: an image good elsewhere but dark in one app points to the SETTINGS of this app (brightness/exposure poorly adjusted, or particular image processing); explore its video options to adjust the brightness and deactivate filters, update it, check its permissions, or reinstall it; your webcam, on the other hand, is fine. The issue is software and local, not hardware.
What to remember
A webcam that gives a DARK image is annoying in video calls, but the cause is almost always the LIGHT — and rarely a defect in the camera. Two points to understand: a webcam needs MUCH more light than your eye (which adapts to dim light: a room that seems « bright » to you may be dark for it), and above all, BACKLIGHT is the #1 trap — a window or a lamp BEHIND you pushes the camera to adjust to this bright background and to plunge you into shadow (you become a silhouette). The key to a beautiful image: light IN FRONT of you, never behind. Concretely: TURN around to have the window IN FRONT (daylight is the best, and free), close the curtain if it’s behind you, and place a simple DESK LAMP near the screen, ORIENTED toward your face — this radically transforms the image, without buying anything. Also check that no WEB CAM COVER is covering the lens (frequent cause of completely BLACK image), that the small LENS is clean, and that the app has the PERMISSION to access the camera. ALWAYS TEST your image in the PREVIEW BEFORE the call (trust what the webcam renders, not your feeling of the room). If the light is good but the image remains dark, explore the APP SETTINGS (brightness, exposure, « low light » mode), update everything, and test another app (if only one darkens, it’s ITS settings). On the hardware side: built-in webcams handle low light poorly (good lighting compensates); for frequent video calls, the PHONE camera or an external webcam give better results — but take care of the light BEFORE buying. Precautions: don’t set the brightness to maximum (the image becomes grainy: add real light instead); aim the lamp at you with soft light (not at the lens, not too harsh); distinguish dark image (light) and black image (cover, permissions, other app using the camera); and check your connection if the image is also jerky. In short, a dark image is almost always corrected for free, simply by placing the light in front of you: enough to appear clear and sharp to your interlocutors, without spending a cent.


Persistent breakdown, capricious device? Our remote troubleshooting service solves your problem quickly, without jargon.
Leave a Reply
You must be logged in to post a comment.